Set Up For Success

1. Choose a Consistent Color Scheme for your Photo
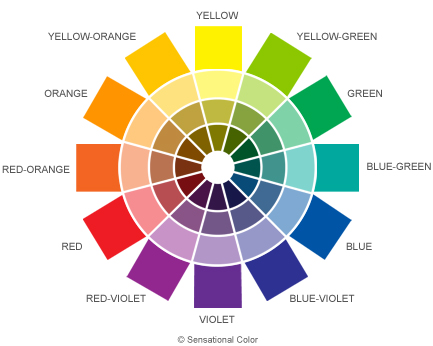
Pick two or three colors to connect all of the items you plan to display in your photo. This will pull the entire image together and allow for a clean final product. The best way to do this is to select one color from the color wheel and select its complementary color, or the two colors to its right or left.
2. Give Yourself A Good Background
Your background is the foundation of your photo. Don’t set up on a dirty or messy floor. And please no more marble and fur. We’ve seen enough! Try to choose a neutral background to allow for the colors of your products to shine. These include white, black, wood, or even a consistent neutral palleted poster.

3. Light Your Shot
Even the most wonderful photoshoot of items can be ruined by bad lighting. Most of the issues can be corrected through editing, but in the case of bad shadows or flashback, there are often no other options than a reshoot. To prevent this, try to light your products equally from all angles to prevent shadows and hold your phone or camera on an angle that will prevent an overcast shadow. You can also use natural light or manipulate lights to create certain shadows. With this in mind, use your discretion on whether or not you should use flash. Products with plastic or glass casing tend to add flash reflections, whereas clothes can typically handle the extra light.


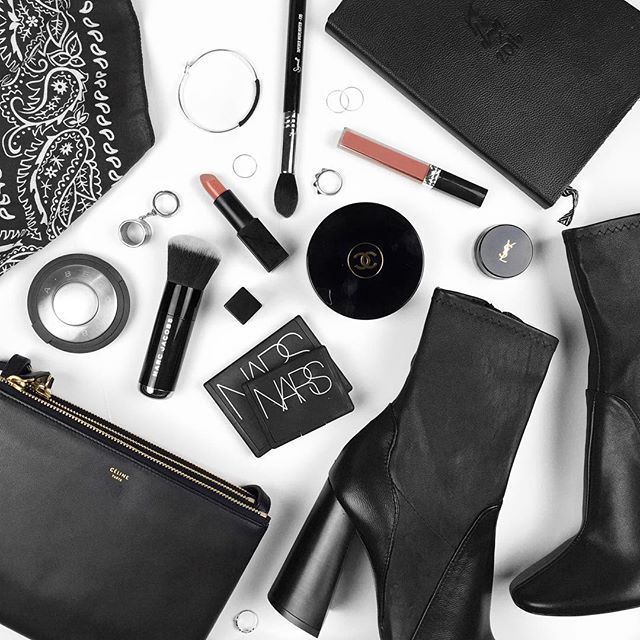
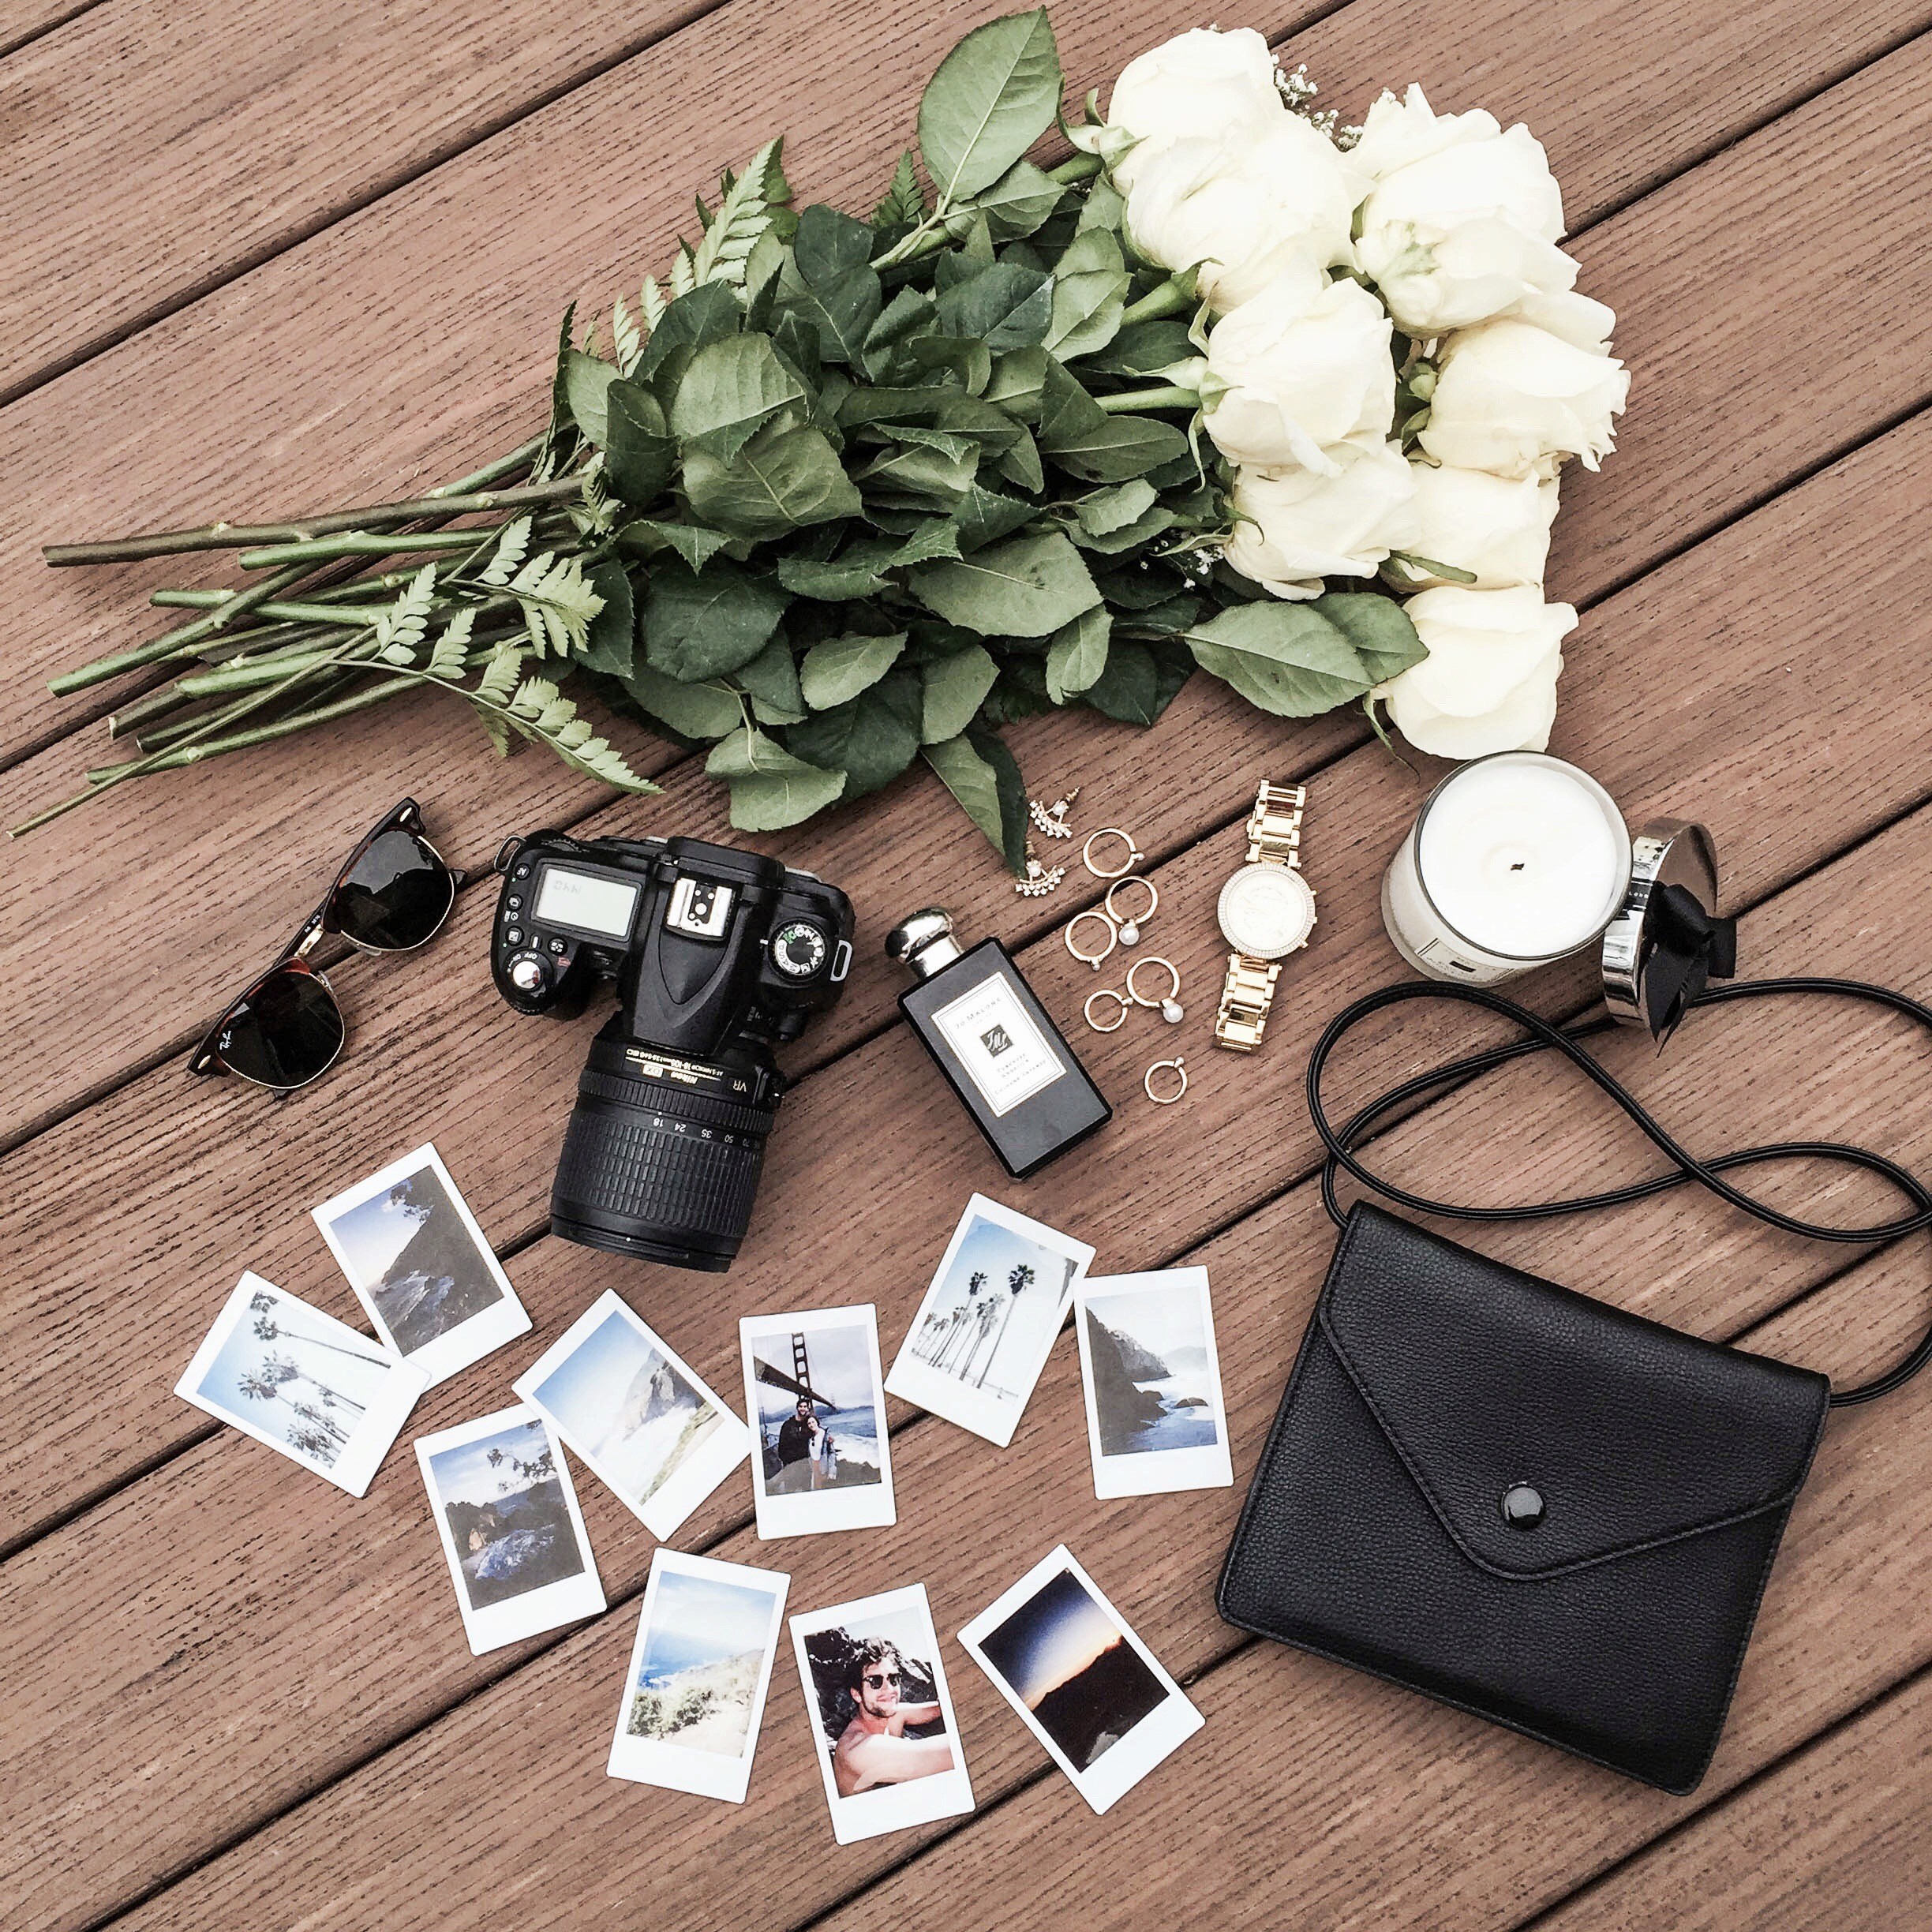
4. The Finishing Details
The importance of the little things is stressed for Flat Lays because the viewer’s eyes spot the inconsistencies and flaws in minimalistic pictures, making the focus on each additional item that much more significant. The best accessories for your photos are items that pair well with the product being highlighted.
Edit Out The Flaws
There are FOUR main edits that can and should be made to any Flat Lay. Those include Contrast, Exposure, Saturation, and Highlights/Shadows. Each of these edits can completely alter the way the photo appears. Add too much contrast and the photo looks harsh, too much saturation and the photo destroys the aesthetic. To prevent the negative results of faulty editing, find a user-friendly editing app like VSCO with the particulars of each edit available to alter. Along with this, make sure to look at your image with all levels of brightness to prevent uploading an overexposed image or something too dark to be seen at medium lighting. Facetune is a great app for finishing touches, especially to erase small imperfections or brighten up a white background.
Mistakes Not To Make
Nobody’s perfect, but you can try to make your Flat Lay as flawless as possible by avoiding these common errors:
- No Plan
- No Focus
- Too Many Distractions
- Messy Background
- No Symmetry
- Bad Focus
- No Personality
By moving items around or getting to know your camera better, you will learn to finesse your approach and style. Always set up a plan before taking the photo. Know what you’re focusing on, how you want to present it, and what you want the vibe to be. Finally, after setting up your Flat Lay, ask yourself if you would find this attractive if it popped up on your feed.
Happy Posting!